Meet my friend Jack, whose costly leather shoes have worn off from the toe and become useless for a while.However, he did not consider it as an end for them. Instead, he fixed the toe cap, using Eagle Shoe Cement.
If you and your shoe are in the same situation, then read this blog.I have shared the common causes of shoe toe peeling off, a complete guide to fix it, and expert tips to maintain its bonding.Read to explore details.
Common Causes of Peeling of Shoe Toe Caps
When you put a step in your shoe, the toe cap is a part that takes most of the pressure.Therefore, it requires an extraordinary adhesive to keep it bonded and intact.Here are some common causes of peeling of your toe caps:
1. Continuous Bending
Every time you walk to take a step, the toe of your shoe bends.In this scenario, if the glue is not flexible, it will start cracking slowly and will not provide proper gripping.Ultimately, the toe will break out.
2. Changes in Heat and Temperature
Keeping your shoes in a hot place, such as direct sunlight or a heated car, can cause the adhesive to soften and weaken.Alternatively, cold weather can make it hard and cause it to fall out.
3. Sweat and Moisture Buildup
Passing through rain, puddle-like conditions, and even your body sweat can moisturize the front portion of your shoes.The existence of continuous moisture will break down your normal glue layering and result in the toe peeling up.
4. Use of Low Quality and Old Adhesive
If your shoes are made with poor-quality materials and an old adhesive, they can peel in the shoe storage even before you use them.Therefore, an aged and weakened adhesive can cause the toe to peel off. All these causes can definitely result in peeling off your shoe toe cap. But, it does not mean that your shoe is deteriorated and useless.It can be repaired using a quality glue.
Use our Eagle Shoe Cement
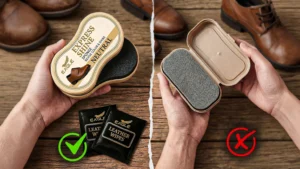
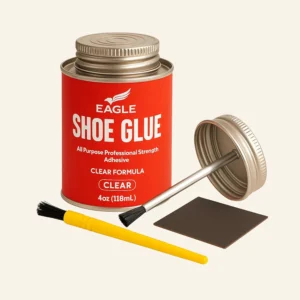
Our Eagle Shoe Cement is the best product for you if your shoes’ toes get peeled off. Because it is not an ordinary glue, it is a heavy-duty shoe-repairing glue.Additionally, it is a waterproof shoe glue for sneakers, boots, and rubber soles.
Step-by-Step Process to Bind a Peeling Shoe Toe
You can fix your detaching shoe toe at home without special tools or training. You only need to follow these easy steps:
Step 1: Cleaning the Toe Area
Before applying the glue, clean the surface of the shoe.For this purpose, smoothly uplift the cracking toe and remove dust with a dry cloth or a soft brush. Additionally, clean the dirt and pieces of old glue.After that, make a cloth wet with soapy water or alcohol and clean the dirty area. Note: Do not soak the shoe. Instead, clean the toe with the wet cloth.
Step 2: Leave it to Dry
Next,let the shoe toe dry completely in the sunlight.Because if a small portion is left wet, the glue will not work. Note: Do not dry the shoe in artificial heat, such as an oven or dryer, because it can damage the shoe material. Step
3: Test the Compatibility of the Toe Cap and the Glue Material
In this step, press the toe cap back without glue.Ensure these things :
Are the toe edges lining up accurately with the upper portion of the toe?
There should be no material folded or with wrinkles. If these two points are ok, then move towards the next phase, glue testing.
Now, apply the Eagle Shoe Cement on a small patch on your shoe to check its compatibility with the shoe material.Move to the next step.
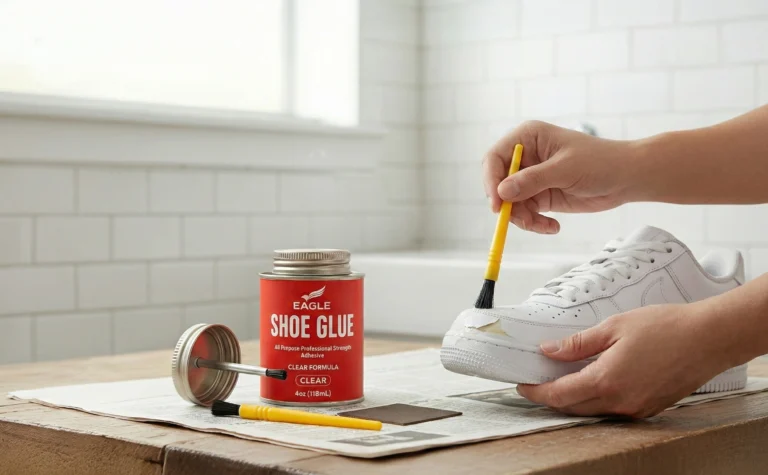
Step 4: Apply the Glue to the Shoe Toe
Now, lift the toe cap and gently apply the Eagle Shoe Cement to cover all the meeting edges.Apply the glue with the gentle brush that comes inside the glue pack.
Tip: Avoid applying the glue in excess because it will create a mess instead of enhancing bonding.
Step 5: Press the Shoe Toe and Leave for Curing
After that, press the shoe toe back into its position with glue.All edges should be aligned and no gaps left. Next, place something heavy but gentle on the shoe top to make it firm.Now, leave the shoe toe untouched for 30 -60 minutes for strong bonding.
Step 6: Final Check and Clean-up
Next, make a final check for bonding of the toe by running your finger along the side of the seal, and clean up the extra glue with a wet cloth. After completion of this process, avoid wearing your repaired shoe for the next 24 hours to ensure a strong and long-lasting bond.
Tips to Keep Your Shoes Always New
You have done a great job by repairing the toe of your shoe with the glue. Now, it’s time to maintain its strength by following these easy tips:
Care for the First Few Uses:
After repairing the shoe toe cap, avoid tough use for the first 1-2 days, such as:
Long walk
Walking through wet places
Playing demanding sports, such as football, volleyball, etc.
Detergent Application: Avoid cleaning your shoes with harsh chemicals and detergents, especially the toe area, to remove the negative effects on the applied glue.
Deep Cleaning Guide: Do not soak your shoe in the water for deep cleaning. It can damage the glue bonding and the toe material.
Proper Storage: Store your shoes after repair in a cool and dry place and avoid direct sunlight. Additionally, do not store them in hot areas, like a car or a plastic bag, for several days. It can dissolve the applied glue.
With these simple and useful tips, you can have your shoes for a longer period and give them a new life.
Conclusion
A peeled-off shoe toe cap is not the end of your precious shoe life.You can fix it using a strong glue and a little professional advice discussed in this blog post.After that, follow these after-care tips and maintain its longer life. Have a nice shoe journey.
Frequently Asked Questions
Why did my sandal sole separate?
It usually happens due to old glue, worn-out material, rough use, or extreme temperatures.
Can I fix a separated sole at home?
Yes, if the damage is small. Eagle Shoe Cement can easily repair minor to moderate separation.
How long should I let the glue cure?
Let the sandals sit for 12–24 hours without movement for a strong bond.
When do I need a professional?
If the sole is fully detached or the sandal structure is damaged, visit a cobbler.
Meet my friend Jack, whose costly leather shoes have worn off from the toe and become useless for a while.However, he did not consider it as an end for them. Instead, he fixed the toe cap, using Eagle Shoe Cement.
If you and your shoe are in the same situation, then read this blog.I have shared the common causes of shoe toe peeling off, a complete guide to fix it, and expert tips to maintain its bonding.Read to explore details.
Common Causes of Peeling of Shoe Toe Caps
When you put a step in your shoe, the toe cap is a part that takes most of the pressure.Therefore, it requires an extraordinary adhesive to keep it bonded and intact.Here are some common causes of peeling of your toe caps:
1. Continuous Bending
Every time you walk to take a step, the toe of your shoe bends.In this scenario, if the glue is not flexible, it will start cracking slowly and will not provide proper gripping.Ultimately, the toe will break out.
2. Changes in Heat and Temperature
Keeping your shoes in a hot place, such as direct sunlight or a heated car, can cause the adhesive to soften and weaken.Alternatively, cold weather can make it hard and cause it to fall out.
3. Sweat and Moisture Buildup
Passing through rain, puddle-like conditions, and even your body sweat can moisturize the front portion of your shoes.The existence of continuous moisture will break down your normal glue layering and result in the toe peeling up.
4. Use of Low Quality and Old Adhesive
If your shoes are made with poor-quality materials and an old adhesive, they can peel in the shoe storage even before you use them.Therefore, an aged and weakened adhesive can cause the toe to peel off. All these causes can definitely result in peeling off your shoe toe cap. But, it does not mean that your shoe is deteriorated and useless.It can be repaired using a quality glue.
Step-by-Step Process to Bind a Peeling Shoe Toe
You can fix your detaching shoe toe at home without special tools or training. You only need to follow these easy steps:
Step 1: Cleaning the Toe Area
Before applying the glue, clean the surface of the shoe.For this purpose, smoothly uplift the cracking toe and remove dust with a dry cloth or a soft brush. Additionally, clean the dirt and pieces of old glue.After that, make a cloth wet with soapy water or alcohol and clean the dirty area. Note: Do not soak the shoe. Instead, clean the toe with the wet cloth.
Step 2: Leave it to Dry
Next,let the shoe toe dry completely in the sunlight.Because if a small portion is left wet, the glue will not work. Note: Do not dry the shoe in artificial heat, such as an oven or dryer, because it can damage the shoe material. Step
3: Test the Compatibility of the Toe Cap and the Glue Material
In this step, press the toe cap back without glue.Ensure these things :
Are the toe edges lining up accurately with the upper portion of the toe?
There should be no material folded or with wrinkles. If these two points are ok, then move towards the next phase, glue testing.
Now, apply the Eagle Shoe Cement on a small patch on your shoe to check its compatibility with the shoe material.Move to the next step.
Step 4: Apply the Glue to the Shoe Toe
Now, lift the toe cap and gently apply the Eagle Shoe Cement to cover all the meeting edges.Apply the glue with the gentle brush that comes inside the glue pack.
Tip: Avoid applying the glue in excess because it will create a mess instead of enhancing bonding.
Step 5: Press the Shoe Toe and Leave for Curing
After that, press the shoe toe back into its position with glue.All edges should be aligned and no gaps left. Next, place something heavy but gentle on the shoe top to make it firm.Now, leave the shoe toe untouched for 30 -60 minutes for strong bonding.
Step 6: Final Check and Clean-up
Next, make a final check for bonding of the toe by running your finger along the side of the seal, and clean up the extra glue with a wet cloth. After completion of this process, avoid wearing your repaired shoe for the next 24 hours to ensure a strong and long-lasting bond.
Tips to Keep Your Shoes Always New
You have done a great job by repairing the toe of your shoe with the glue. Now, it’s time to maintain its strength by following these easy tips:
Care for the First Few Uses:
After repairing the shoe toe cap, avoid tough use for the first 1-2 days, such as:
Long walk
Walking through wet places
Playing demanding sports, such as football, volleyball, etc.
Detergent Application: Avoid cleaning your shoes with harsh chemicals and detergents, especially the toe area, to remove the negative effects on the applied glue.
Deep Cleaning Guide: Do not soak your shoe in the water for deep cleaning. It can damage the glue bonding and the toe material.
Proper Storage: Store your shoes after repair in a cool and dry place and avoid direct sunlight. Additionally, do not store them in hot areas, like a car or a plastic bag, for several days. It can dissolve the applied glue.
With these simple and useful tips, you can have your shoes for a longer period and give them a new life.
Conclusion
A peeled-off shoe toe cap is not the end of your precious shoe life.You can fix it using a strong glue and a little professional advice discussed in this blog post.After that, follow these after-care tips and maintain its longer life. Have a nice shoe journey.
Frequently Asked Questions
Why did my sandal sole separate?
It usually happens due to old glue, worn-out material, rough use, or extreme temperatures.
Can I fix a separated sole at home?
Yes, if the damage is small. Eagle Shoe Cement can easily repair minor to moderate separation.
How long should I let the glue cure?
Let the sandals sit for 12–24 hours without movement for a strong bond.
When do I need a professional?
If the sole is fully detached or the sandal structure is damaged, visit a cobbler.